Tomato Sauce and The Red Hill Show...
/It is count down in this house...only 7 days to go before the craft, cooking and preserve entries are due...only 9 days to go for vegetable and flower entries...It's the Red Hill Agricultural and Horticultural Show!! I was thinking about the show tonight...it is already 12:30 and I am waiting for my winning tomato sauce...not trying to brag but it really did win the blue ribbon in the savory sauce category last year...to finish simmering so I can go to bed. Tomorrow is a harvest day...but the tomatoes would not, could not wait...slowly over-ripening in the basket on the floor.
I reckon that tomato sauce used to be a luxury. It is simmered with exotic spices...island spices and sugar...all commodities that were traded...not necessarily grown in every home garden. Not only that, it takes alot of tomatoes to make a little bit of thick, lightly spiced, slightly tangy, sauce. The mother of the house, being the manager of the home garden, the head cook and chief nutrition expert of her ever growing family, might have first jarred tomatoes for stews, then dried them for flavouring and lastly, if there were still more...and time...made condiments. And it would have had to have been a good farming year to have been able to afford imported, island spices.
Our society does not think about that now...as they line up for their chips with sauce and pies with sauce. Where did those tomatoes come from and how many did it take to make that small plastic container of sauce. And so they consume it, without appreciating what a true treat and treasure a jar of tomato sauce would have been in the larder.
We make Christmas chocolates in this house. These are lovely truffles...maybe not as fine as Chocolatiers but we do use pure ingredients and rich chocolate. My children love making the chocolates, love making the packaging and love giving them away...but they also love the few extras saved in the deep freezer. They know that when a special guest comes over, the desert may include "Christmas Chocolates" ...even if it is a March Sunday Lunch...and they delight in taking out all of the containers...one for each sort of truffle...and preparing a party plate to offer first to the guest before diving in themselves.
Tomato Sauce would have been the same! It would have been a preserved treasure, brought forth from the cellar, only for special guests and/or occasions. It would have been served with a silver spoon, savoured even after the meal was cleared...the jar would have been scraped clean with a finger.
But our current society uses it and most food without thought or consequence. I am left wondering about the aspirations of the poor to be like the rich...the promises offered by assembly line work...You, too, can eat tomato sauce with every meal!...a slogan pinned under the wood cut of a worker doing a menial job but persisting to "better" the family...with tomato sauce at every meal...yes these must be late night ponderings!
Where has our callous...maybe even ignorant... attitude about our food gotten us, as a society? High rates of childhood diabetes, population obesity and a complete disconnection from our food, where it comes from, why it is special...why it should be treasured, savoured.
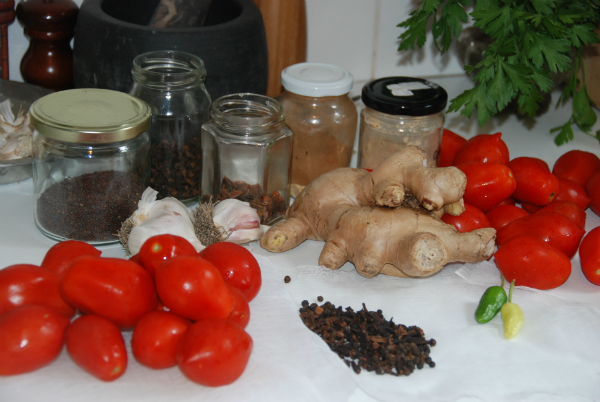
And so I sit, smelling the lovely fragrance of these island spices...all spice berries from the Greater Antilles, Southern Mexico and Central America, cloves from Indonesia, India and Sri Lanka and ginger from southeast Asia. Mixed with white wine vinegar , sugar and our organic tomatoes...the ones too ripe to give to our members. My son especially will be so excited tomorrow when he wakes to the smell filling the house as he sleeps. The very special, very treasured five jars of tomato sauce...from 5 kilos...yes 5 kilos yeild only 5 500ml jars... of over ripe Romas
And this is what makes the Red Hill Show so special. As a mother, as the manager of the house garden, head chef and chief nutritionist, if I have the produce to make such an exquisite delight as tomato sauce, what a beautiful thing to enter in to the show, where it will be appreciated, marveled at, and honoured. "Wow, they had enough tomatoes to make tomato sauce this year!" The show is not just a place for family entertainment, it is where, at this time of year, when I am staying up until 1am waiting for my preserves to finish, I can join with the other mothers, garden managers, head chefs and chief nutritionists and appreciate the fruits of their labour too!
Vegetable Entry Forms are due by Wednesday, 27 march. Delight in the community celebrating the growing of food and flowers, rearing class animals, riding horses, making crafts and cooking, preserving and fermenting.
Post Note: I just have to add how wonderful these passed on recipes are...scribbled, doctored, worn, stained and faded family favourites. This tomato sauce recipe came to me in my children's grandmother's handwriting, entitled "Stephanie Tomato Sauce - given to me by Minetta 22/2/12". I wonder where this recipe originated, where it has been, how it has changed. My thoughts and changes are added to the patina...and then passed on again.


